Kubuntu provides a package that allows you to take advantage of the capability of your NVidia Graphics Card.
Installing the NVidia Graphics Driver
1. Open Adept by going to K->System->Package Manager (Adept)
2. Type nvidia on the Quick Filter text box.
3. Choose nvidia-glx from the list.
4. Click the install package button.
5. Click commit changes button. You can find it on the menubar of Adept.
After installation you still have to enable the graphics driver.
Enabling the Nvidia GLX driver
1. Go to the Linux console by clicking K->System->Terminal Program (Konsole)
2. Type:
$ sudo nvidia-glx-config enable
3. Provide the administrator password
You will know that your installation is successful if you see the NVidia splash screen everytime X windows starts.

Saturday, November 26, 2005
Linux Gaming Part 4 - Installing NVidia Graphics Driver
Friday, November 25, 2005
Linux Gaming Part 3 - Installing Cedega
The installation procedure of Cedega is very similar to WINE.
You can always compile from source but the quickest way to install Cedega is to get the latest stable package at http://transgaming.com.
You first need to subscribe in order to have access to this package.
One you have downloaded the package you simply:
1. Open the Linux Console
2. Type:
$ sudo dpkg -i cedega_5.0.1_i386.deb
3. Type:
$ cedega
This will display the license agreement screen.
4. Simply click the accept button
5. Enter your subscription user and password
6. Just follow the rest of the setup wizard's instructions
Cedega would download Microsoft Fonts, MozControl Package, then finally the Cedega Engine.
To confirm that Cedega has really been installed click K->Games->Transgaming Cedega.
It's there.
Tuesday, November 22, 2005
Linux Gaming Part 2
WINE Versus Cedega
WINE and Cedega can both be used to run Windows compiled games in Linux.
WINE though covers a wider scope. It is intended to run not just games but every Windows application.
The philosophy behind this, of course, is that if people can run every Windows application in Linux then they would have an easier time shifting to Linux.
Cedega on the otherhand is solely intended to run Windows games.
WINE pros
1. free
2. can run older Windows games
WINE cons
1. It's wider focus leads to slow development with regards to gaming.
Cedega Pros
1. Can run several of the latest Windows Games
2. Faster gaming development
Cedega Cons
1. Requires $5 subscription per month ( $15 initial subscription)
In the long run Cedega becomes costly. A one year subscription would amount to $60. And you are just paying for the ability to run a Windows game. You haven't even bought a game yet.
Saturday, November 19, 2005
Linux Gaming Part 1
I promised that on my next post I would discuss about accessing shared folders from Windows to Linux. Unfortunately, I would have to satisfy that promise on some future post.
In the meantime, Let me begin a series on another important topic that concerns Linux. That is the efforts to make Linux a serious gaming platform.
There are two kinds of movement to make Linux a serious gaming platform.
The first push is to develop games that are native to Linux. an example of this is Planeshift3D although it also runs on Windows and Mac OSx.
The other effort is to make Windows native games run on Linux through software translation. Examples of these efforts are Wine and Cedega.
Lets discuss about the first kind of effort. Linux gamers would always be left out by Game Publishers. There would always be a huge discrepancy between games published for Windows and those that are also published for Linux.
Linux thrives as a server OS but at the moment there are simply too few customers using Linux as desktop that the game publishers are not investing effort to make their titles available for Linux.
These may change in the future when more people have Linux for their desktop.
Perhaps the current trend of moving productivity softwares to web based will also help change this fact.
When most applications become web based it would not matter anymore to people whether they are using Linux or Windows for their everyday tasks.
This would help accelerate their shift to Linux since Linux is freely downloadable and comes with no license cost.
When this day comes game publishers would have to anticipate where their users would be coming from. And they would have to support all platforms.
But it remains to be seen.
Perhaps three years more before we see this happening.
Wednesday, November 16, 2005
Some Comments on Samba
Update July 2009: Kubuntu 8.10 and Samba
First Note. Samba is intended to be installed on one machine that will act as a file server. A file server of course is a computer whose sole purpose is to keep files that people want or need to share.
Kubuntu comes with a built-in Samba client that enables it to read and write to shared folders.
But on many cases today where Linux is being pushed as a Desktop OS (Operating System) this scenario would not work. Because people would want to share files on their own computer without going to a dedicated file server.
In this case, you have to install the whole Samba package (client and server) on the machine.
Second Note, only the administrator can set the folder sharing feature. If you're the only one using the workstation and you have administrator privilege, this would not be a problem. But if another user is using the workstation and they don't have administrator privilege, this would be difficult and time consuming for the administrator. Because they would have to call the administrator everytime they want to make changes to their folder settings.
A good way to tackle this would be for the administrator to predesignate a folder where users could drop files they want to share.
So far we have just tackled sharing files from Linux to Windows and Linux to Linux.
On the next post we will talk about sharing files from Windows to Linux.
Monday, November 14, 2005
How To: Share Files Using Samba
Please refer to this update: Kubuntu 8.10 and Samba for the newer and improved way of handling this.
In order for Kubuntu to share files with other Linux and Windows machines, you must setup a file server.
You can use Samba or NFS for this purpose. But for this tutorial we will only use Samba.
Installing Samba Server
1. Click K->System->Package Manager (Adept)
2. Type the administrator password then click OK
3. Type samba in Quick Filter
4. Select it from the list then install
5. Close the Package Manager
Setup Samba for File Sharing
1. Click K->System Settings
2. Click on Sharing
3. Choose File Sharing
4. You must be in the Administrator Mode to enable file sharing so click on the Administrator Mode button
5. Type in the administrator password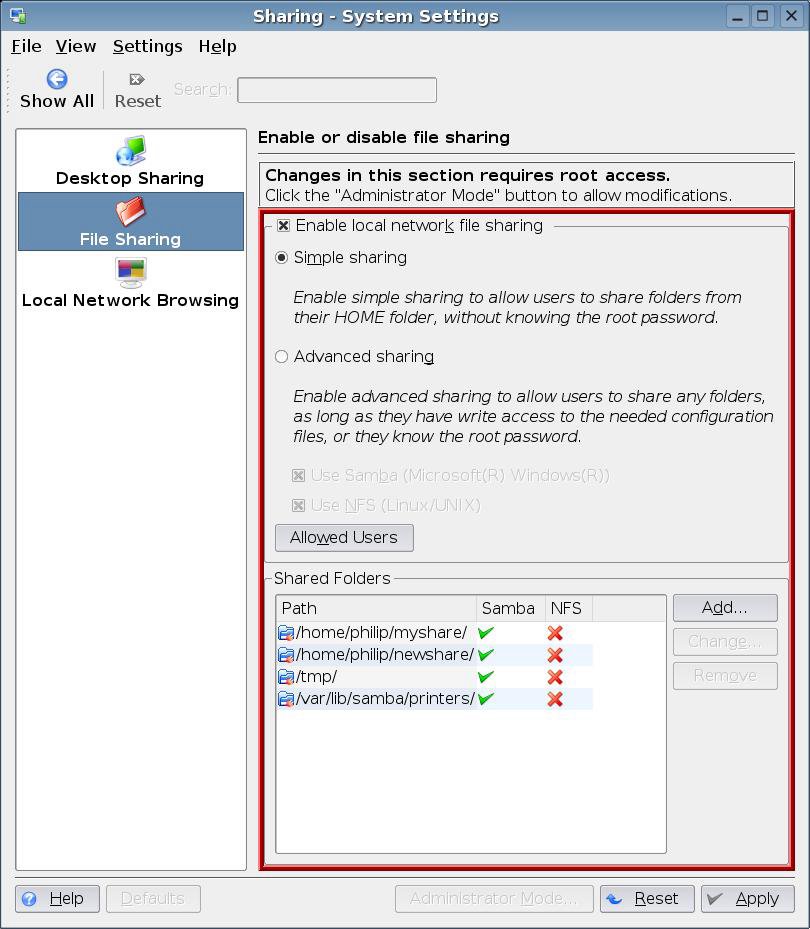
6. Click on Allowed Users
7. Choose Allow all users to share folders then click Ok
Sharing Folders
1. Click on Konqueror on your menubar (it's the third icon)
2. Click Home Folder
3. Right click then choose Create New->Folder
4. Name your folder "MyShare"
5. Right Click on MyShare folder then click on properties
6. Click on the Share tab
7. Click on Configure File Sharing
8. Type the administrator password
9. A new window will be shown.
10. Click on Add
11. Choose the folder that you want to share
12. Click Ok
13. Check "Share with Samba (Microsoft(R) Windows(R))"
14. Check Writable if you want other users to have write access to the folder otherwise you can leave it so that it will be read-only.
15. Click Ok
You have just shared your folder to other Linux and Windows machines.
Accessing Shared Folders
1. Open Konqueror
2. Click Network Folders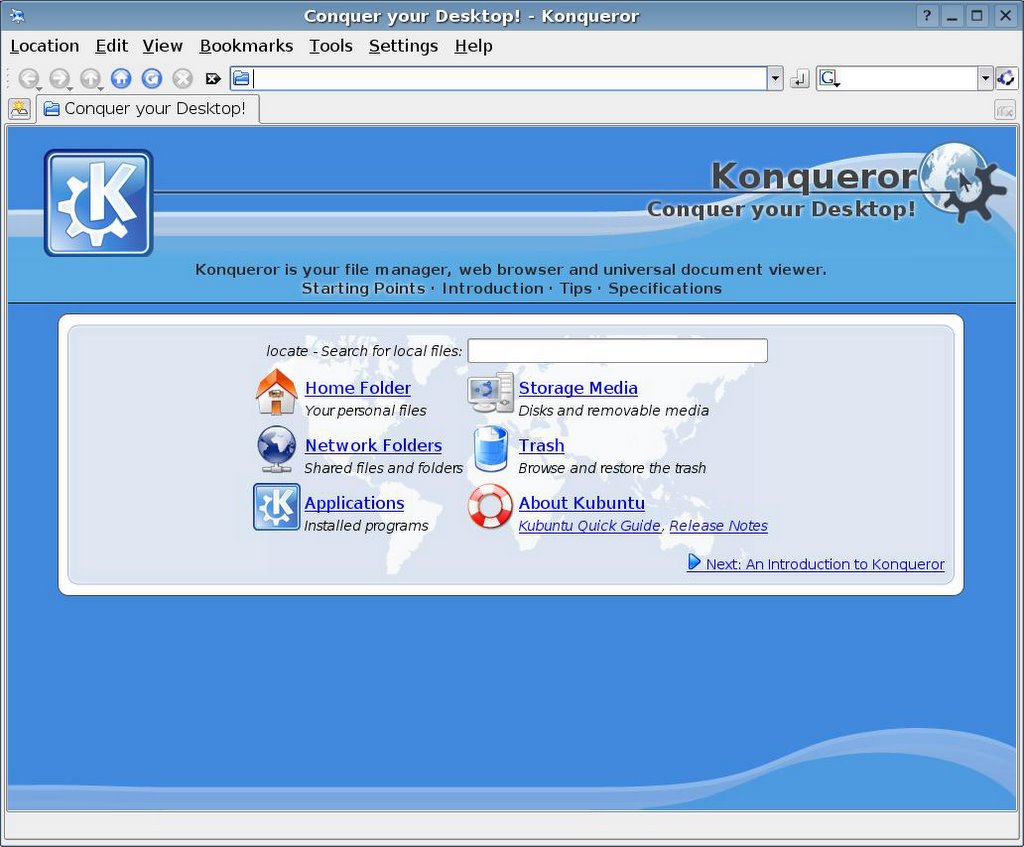
3. Click Samba Shares
4. Choose the workgroup that you want to access. In our case, to be able to access the folder that we have just created you have to click Mshome.
Mshome is the default workgroup that samba created for our Kubuntu machines.
5. Choose the computer name of the Kubuntu machine where you created the shared folder.
Start accessing your shared files.
On my next post I will share to you some insights and the problems I encountered before I was able to make this configuration work.
Saturday, November 12, 2005
HOW TO: Create a Shortcut in Kubuntu
You can customize your menu to have easy access to your frequently used applications. But a quicker way to do this would be to access them through a desktop shortcut.
To create a shortcut:
1. Right-Click on the desktop.
2. Choose "Create New"
3. Select "Link to Application"
This window will be displayed
4. Replace "Link to Application" with the name of the application that you are going to run. Let's replace it with Firefox.
5. Click on the Gear button to choose an icon.
6. Click on the Application tab.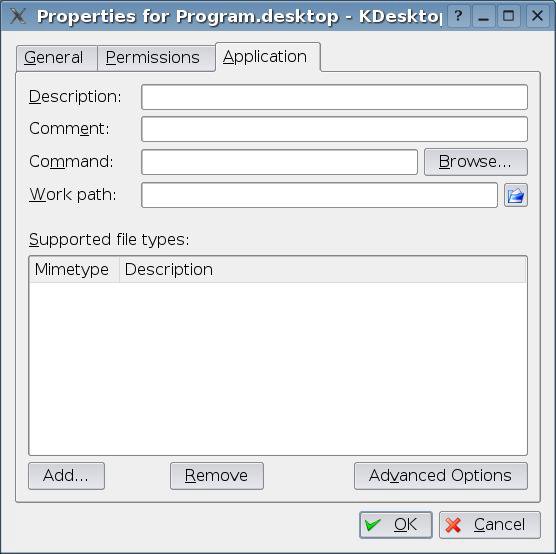
7. Type firefox in the "Command" text box
8. Click Ok
Your desktop screen should appear somewhat like this : Notice my shortcut icon on the upper left corner.
Friday, November 11, 2005
Installing Macromedia Flash Player
If you like watching animated flash movies, then you definitely need to install a flash plugin for your browser.
July 2009 Update:
(Adobe now offers an Ubuntu 9.04+ deb package of the Flash Player. You should get that version instead.)
1. Visit the Macromedia Flash Player download section. Then download the software.
(I am assuming that you are using Firefox and you have already set the download location to your home directory.)
2. Open the Linux Console / Terminal
3. Type
$ tar xzvf install_flash_player_7_linux.tar.gz
(
a. For deb package installers type: sudo dpkg -i install_flash_player_10_linux.deb
This is necessary to check for dependencies.
b. Then type sudo apt-get -f install
to finally install the software
)
This will create a install_flash_player_7_linux directory.
4. Go to this directory by typing:
$ cd install_flash_player_7_linux
5. Type:
$ ls
You will notice a file flashplayer-installer.
6. Type:
$ ./flashplayer-installer
7. Press ENTER to confirm the installation.
The Flash Player requires to files two be installed before it could run properly. These files are gsfonts, gsfonts-x11. Be sure to install them first using adept in Kubuntu and synaptic in Ubuntu.
If you are not familiar on how to go about this, you can refer to my earlier post - Installing Additional Software with Synaptics.
8. After you have installed these two files just continue your installation by pressing ENTER
9. It will display
----------- Install Action Summary -----------
Macromedia Flash Player 7 will be installed in the following directory:
Mozilla installation directory = /home/anthony/.mozilla
Proceed with the installation? (y/n/q):
10 . Just type "y" for yes.
11. Go visit http://www.newgrounds.com
Or you could try some of the fun flash games that I play.
Enjoy!
Thursday, November 10, 2005
Linux: A Programmer's Dream OS
One of the things that attracts me to Linux is the breadth of programming tools/softwares that comes with it.
If I need to program in C, I can use gcc or g++. If I want to program a GUI driven application, I can either program using tcl/tk or I can use gtk with C.
If I am a perl programmer, Linux also comes with it.
If I need a database server, there is postgressql and mysql.
Best of all they are all available for free.
Can you just imagine how many thousands of dollars it would cost if one were to buy each of these softwares?
Another thing is that Linux, along with these programming softwares, come with their source code. If you take the time to study or tinker with them you could really learn a lot.
Tuesday, November 08, 2005
HOW TO: Kubuntu Screen Capture
One of the things I like about Kubuntu Linux is the builtin screen capture program, Ksnapshot.
You can find it in the menu when you click "K" then "Graphics" then "Screen Capture Program".
It is a very handy tool especially for someone doing a tutorial blog like me.
Ksnapshot Options
New Snapshot button - initiates the screen capture
Save As button - allows you to specify the file where you are going to save your screen capture. It also allows you to specify in what graphics format to save whether it be jpeg, png, bmp, etc. (the default is png).
Capture Mode - Allows you to specify what part of your screen to capture.
You can set it to:
a. Fullscreen - to capture the entire screen.
b. Window Under Cursor - to capture the current window that you select
c. Region - to capture a portion or region of the screen.
Snapshot Delay - Allows you to specify when the screen capture will be initiated. You can either tell it to start capturing immediately after you click the left mouse button or say after 3 seconds.
Sample Session
1. Open Ksnapshot
2. Set the Capture Mode to Fullscreen.
3. Click the New Snapshot button. The cursor will change into a crosshair.
4. Click on the screen. You will notice that the preview screen in ksnapshot changed.
5. Click the Save As button.
6. Set the Filter option to JPEG Image then choose an appropriate filename.
You can now use this image in your own tutorials.
